
How to Create and Sell Your Online Course on Kajabi (Step-by-Step Guide for Beginners)
Feb 21, 2025
Launch Your Online Course in Just a Few Clicks!
If you've been putting off creating your online course because it feels too overwhelming, you're not alone. But what if I told you that you could build and sell your course in less than a day, without tech headaches?
In this step-by-step Kajabi tutorial, I’ll show you exactly how to set up your course, sales funnel, and automations so you can start selling right away, even if you're starting from scratch!
Why Kajabi? The Best All-in-One Platform for Course Creators
If you're serious about building and scaling an online course, Kajabi is hands-down one of the best platforms available. Why? Because it offers everything you need in one place, without the need for third-party tools. With Kajabi, you get:
- Course hosting (video, audio, PDFs, quizzes, certificates, and more)
- A built-in website (no need for WordPress, Wix, or Squarespace)
- Email marketing and automation
- Sales funnels, checkout pages, and payment processing
- Community & membership features
- Webinar & live coaching capabilities
- Mobile app for your students
Instead of spending time and money integrating multiple tools, you can use Kajabi as an all-in-one solution—making it easier to launch and grow your course business fast.

Step-by-Step Guide: How to Create Your Online Course on Kajabi
Ready to build and launch your course? Follow these easy steps to set up your entire online course on Kajabi.
Step 1: Sign Up for Kajabi (With Exclusive Bonuses!)
Before we dive in, you need a Kajabi account. If you sign up using my affiliate link, you’ll receive exclusive bonuses:
- 🎁 Kajabi Kickstart Course: A step-by-step guide to launching your business.
👉 Sign up for Kajabi here and get started today!
Step 2: Create Your Course Inside Kajabi
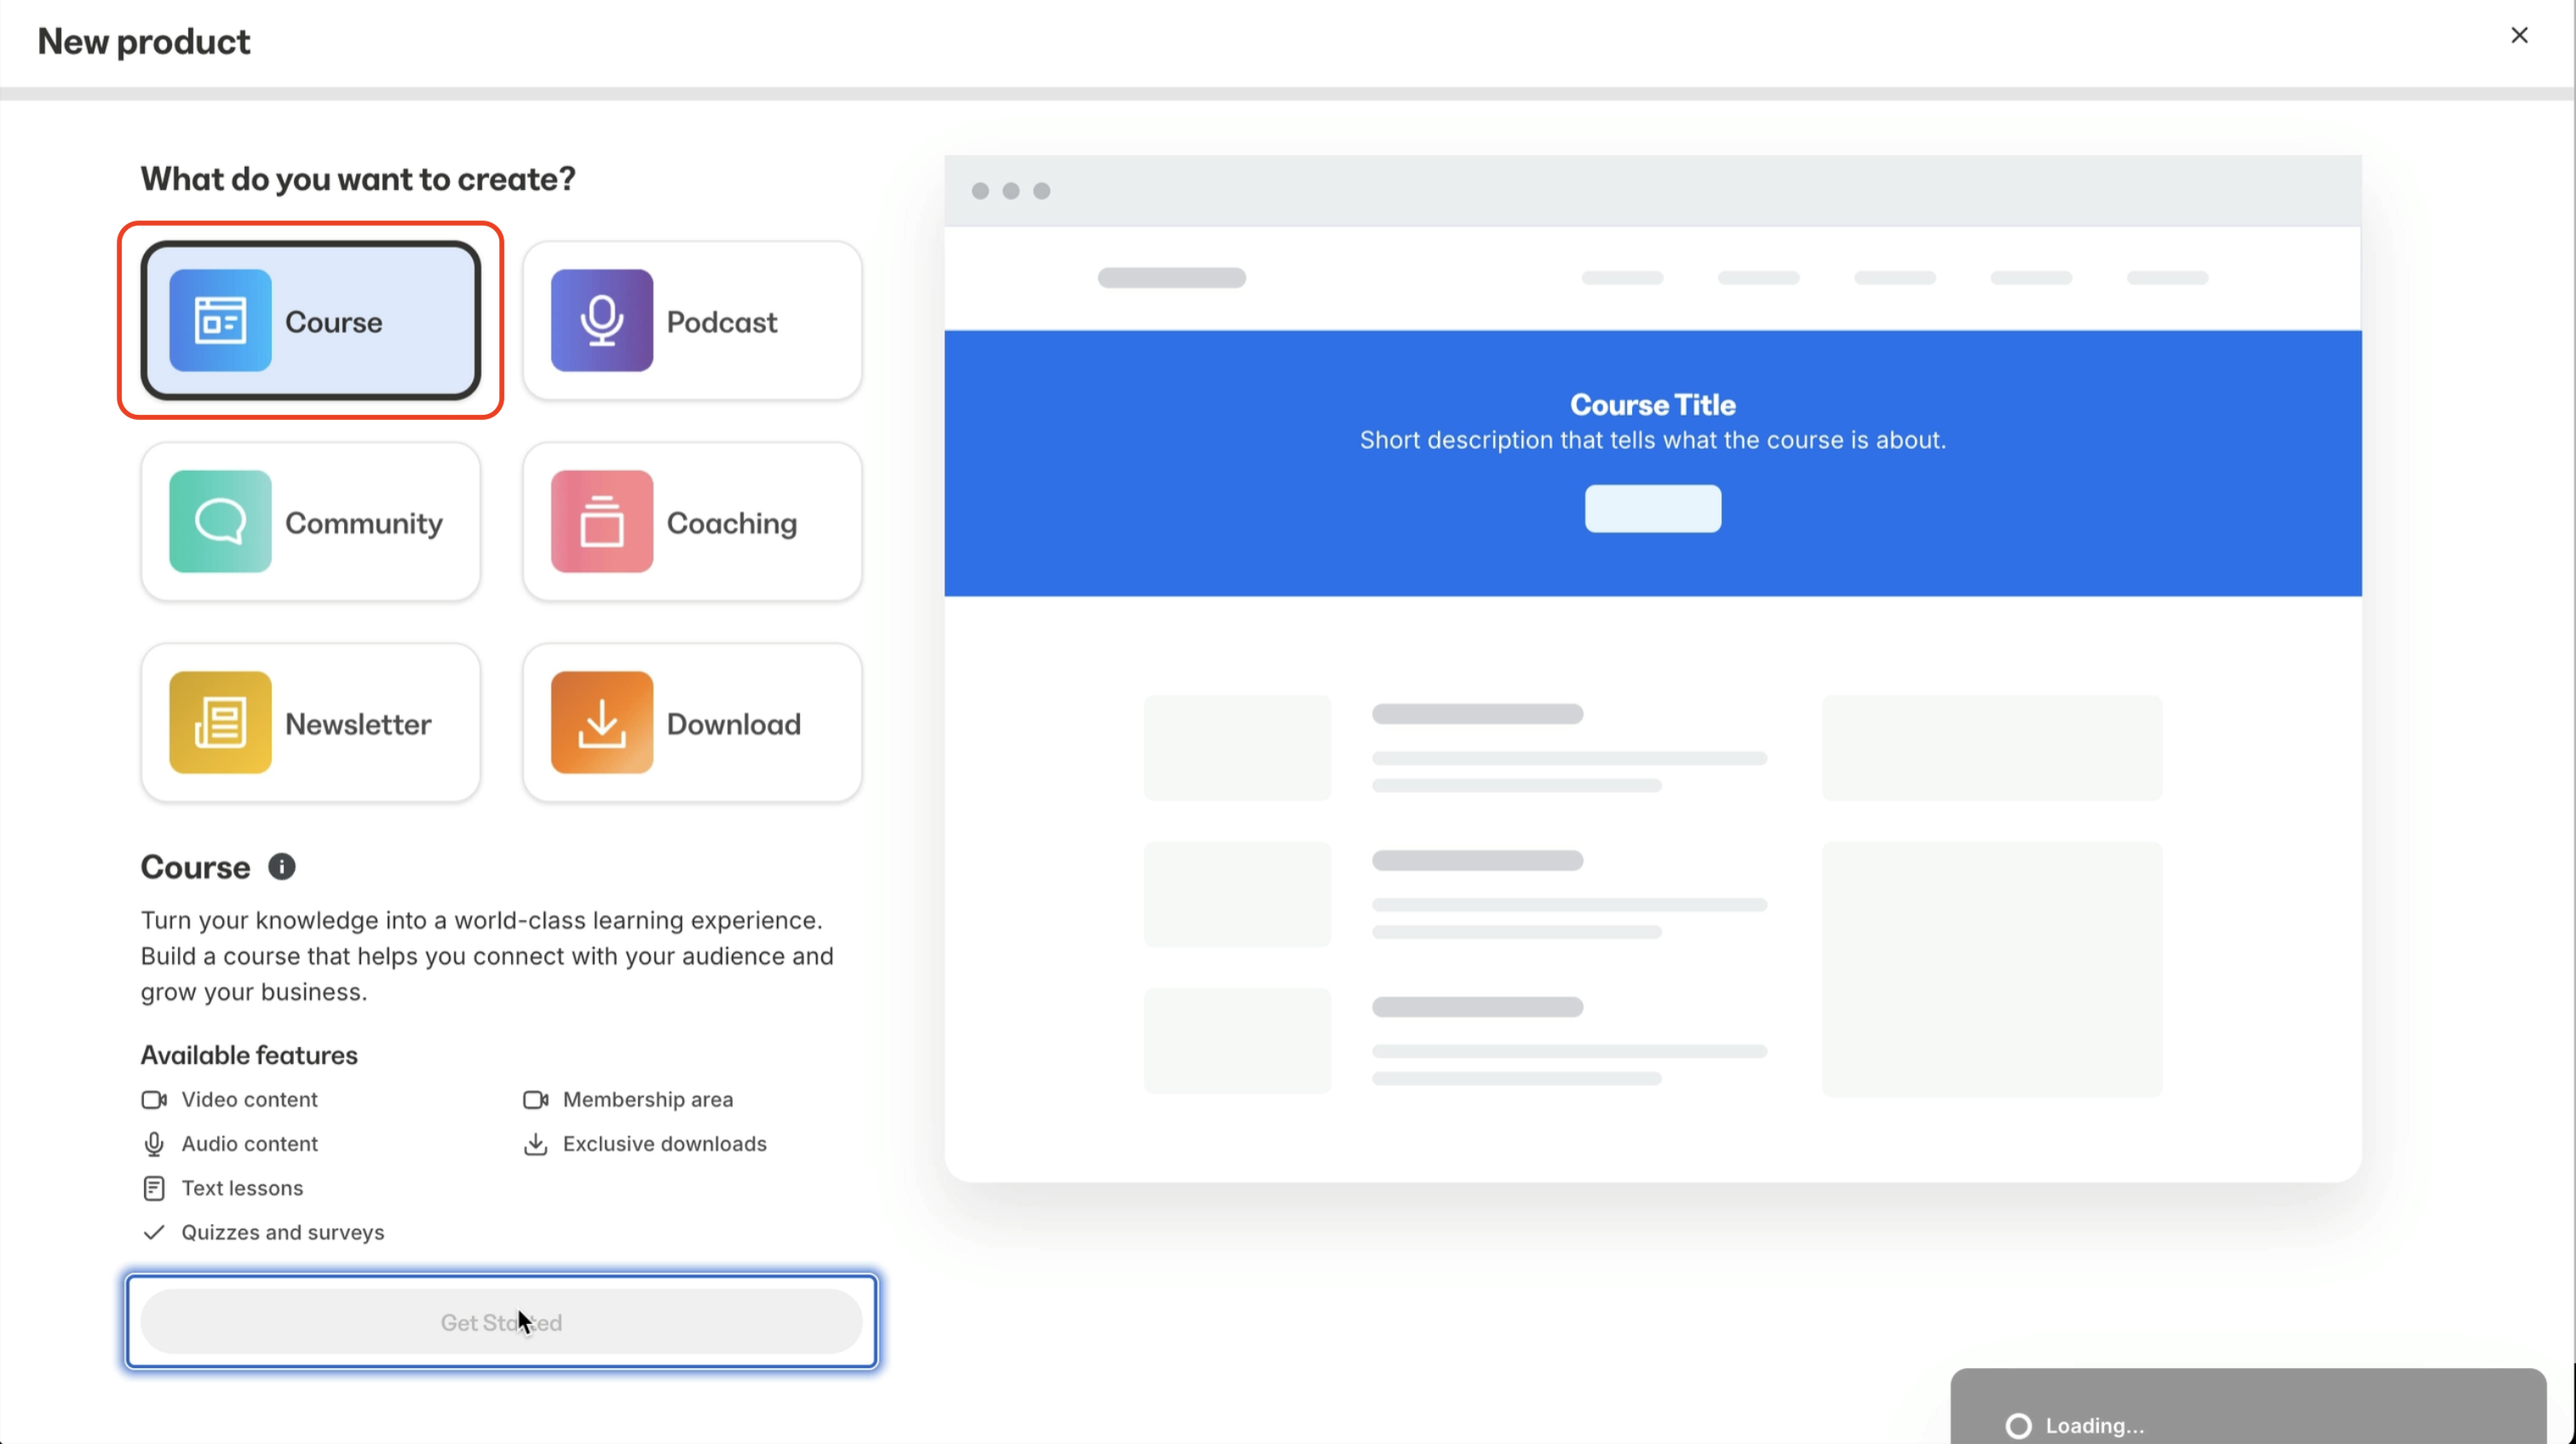
1. Go to “Products” → Click “Get Started”

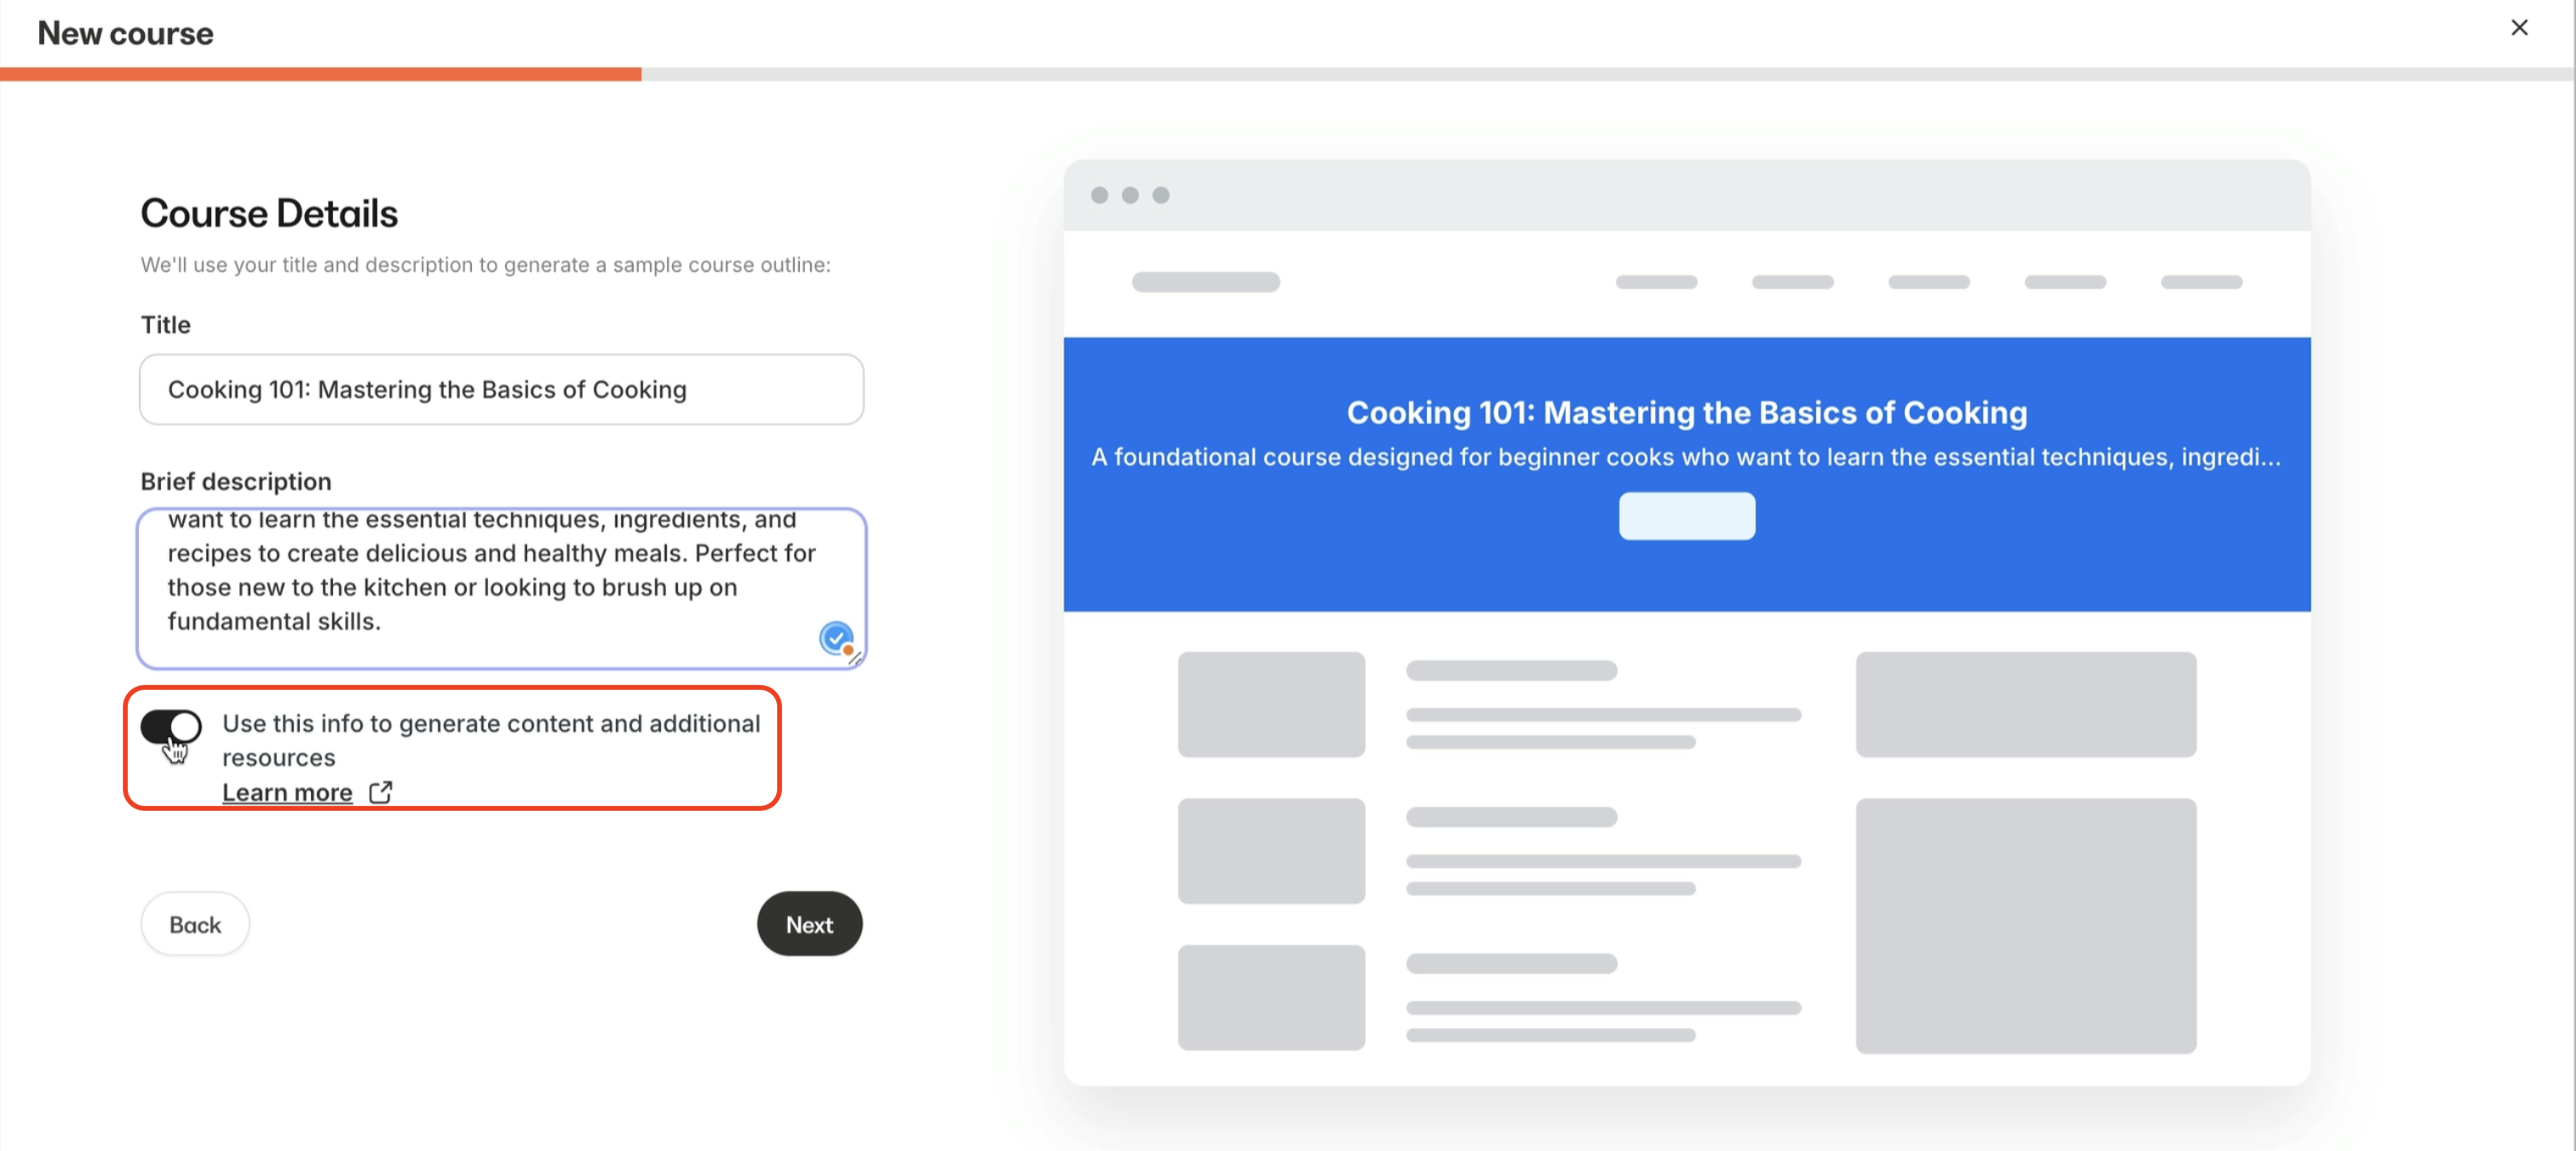
2. Choose “Course” and give it a title (e.g., Cooking 101)
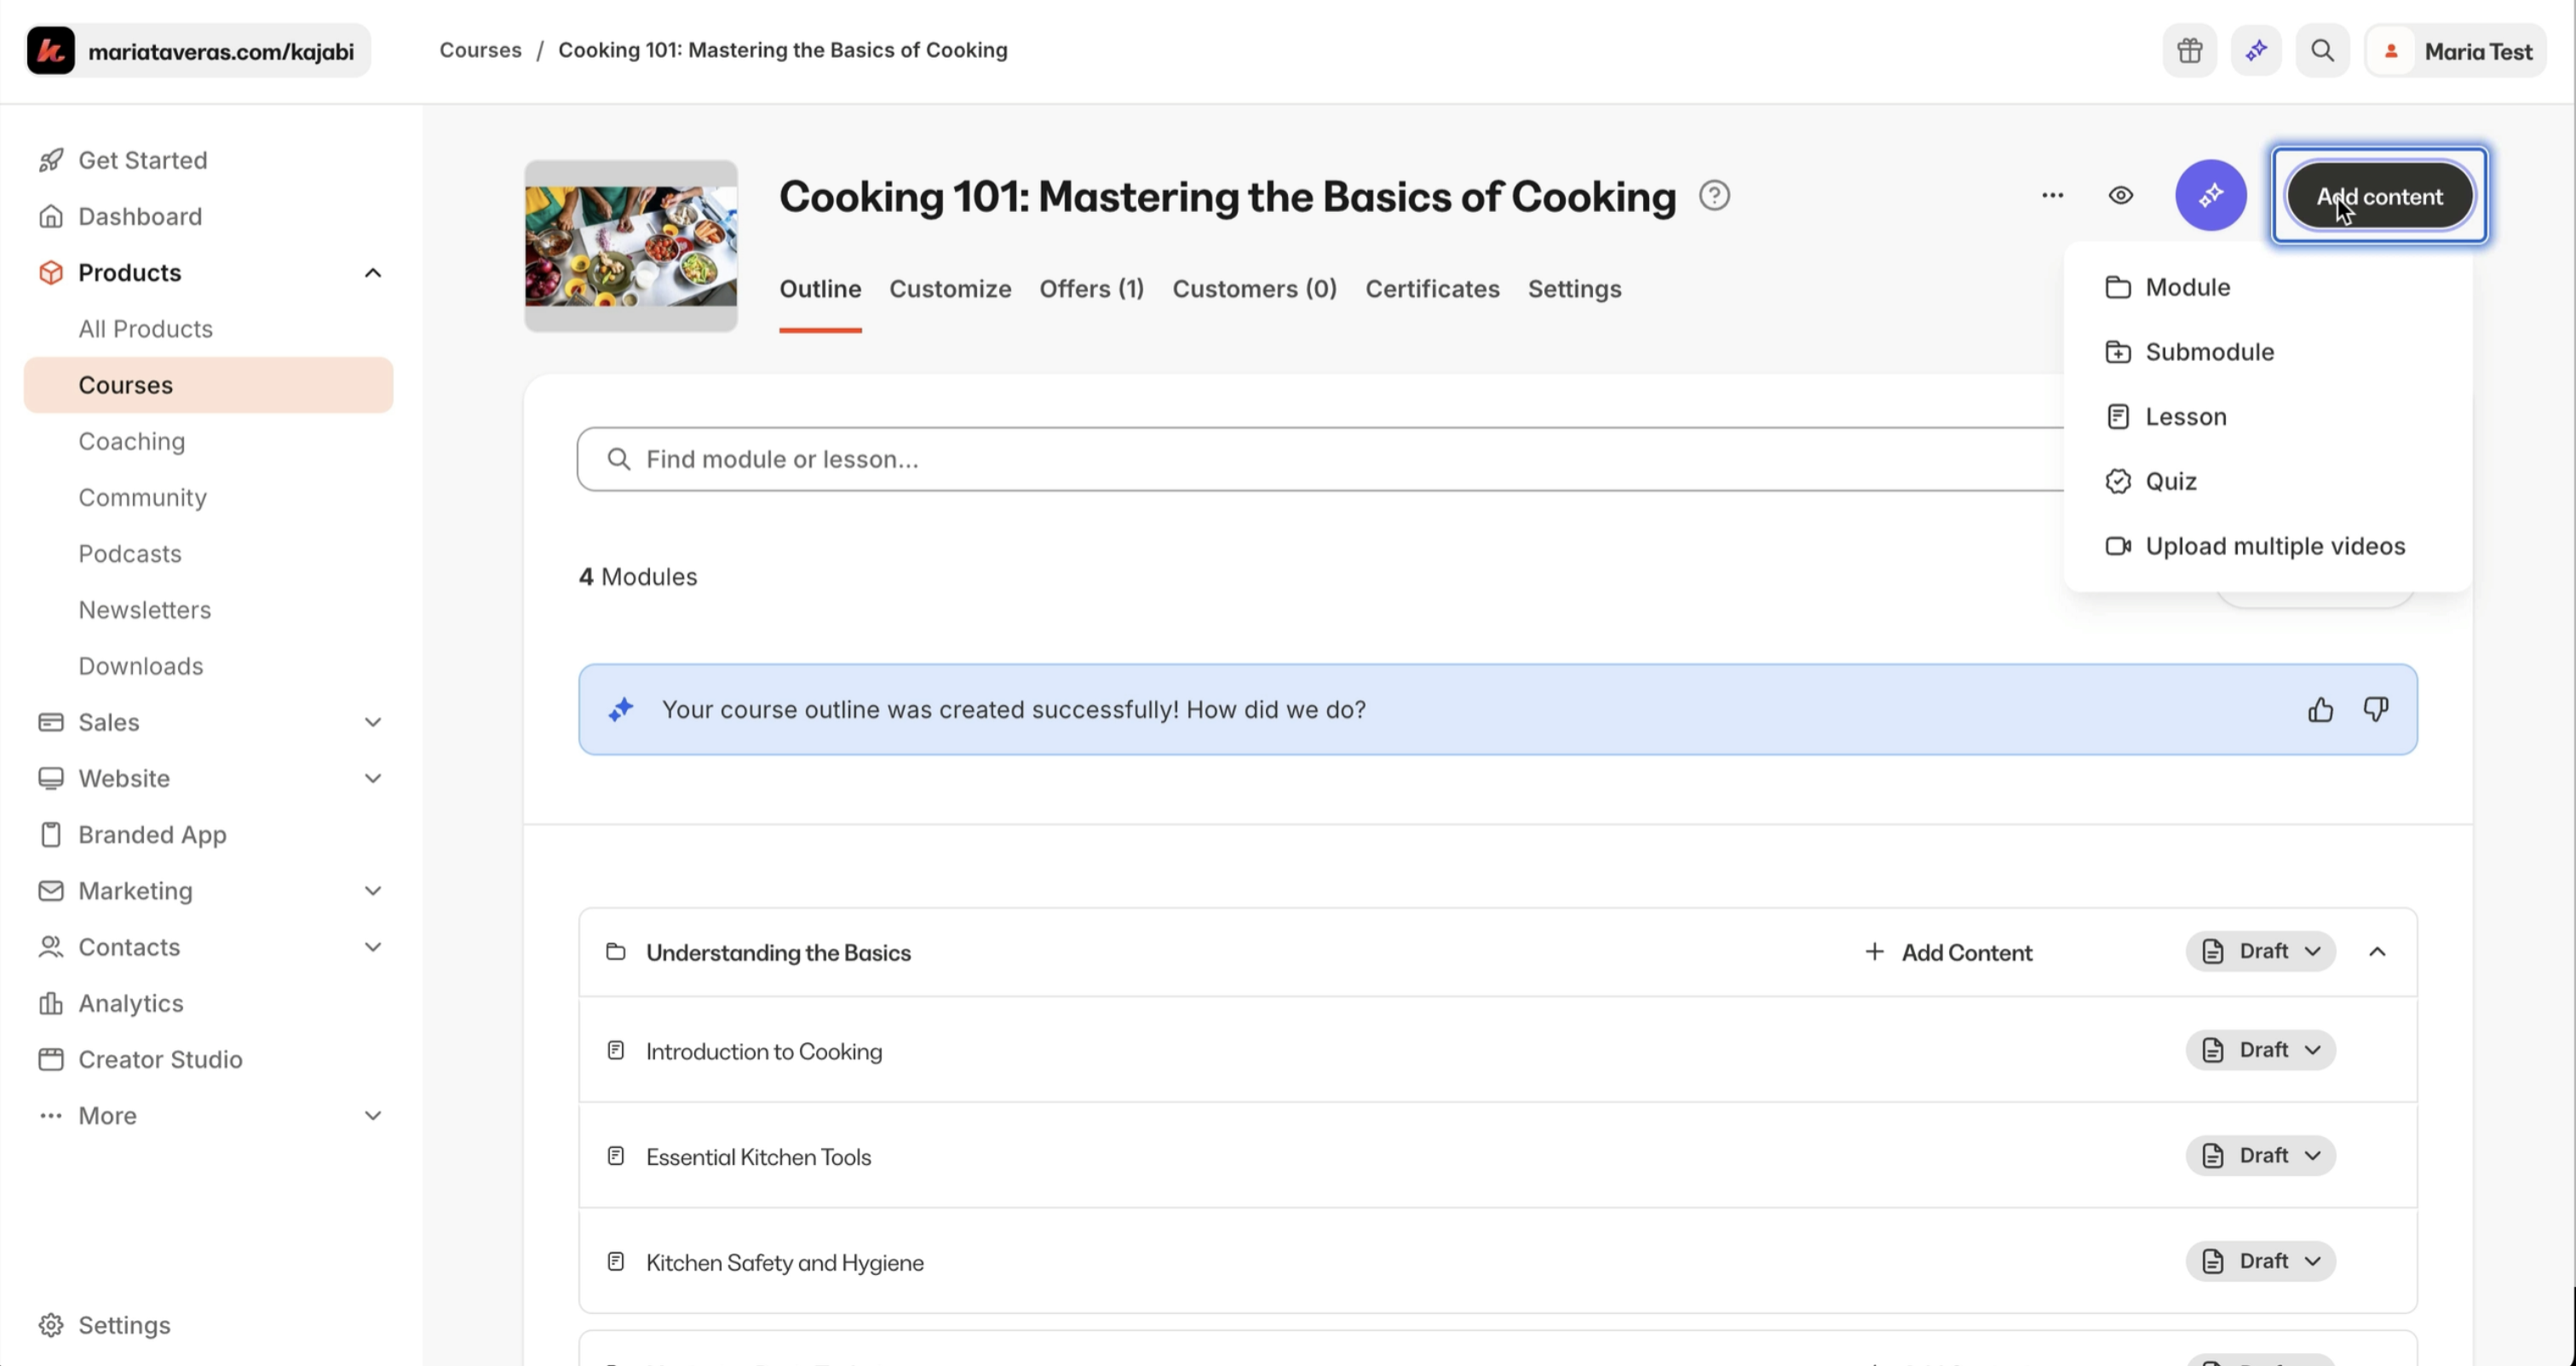
3. Use Kajabi’s AI Content Assistant to auto-generate course structure (or customize manually)
4. Set up Modules and Lessons (add videos, PDFs, quizzes, etc.)
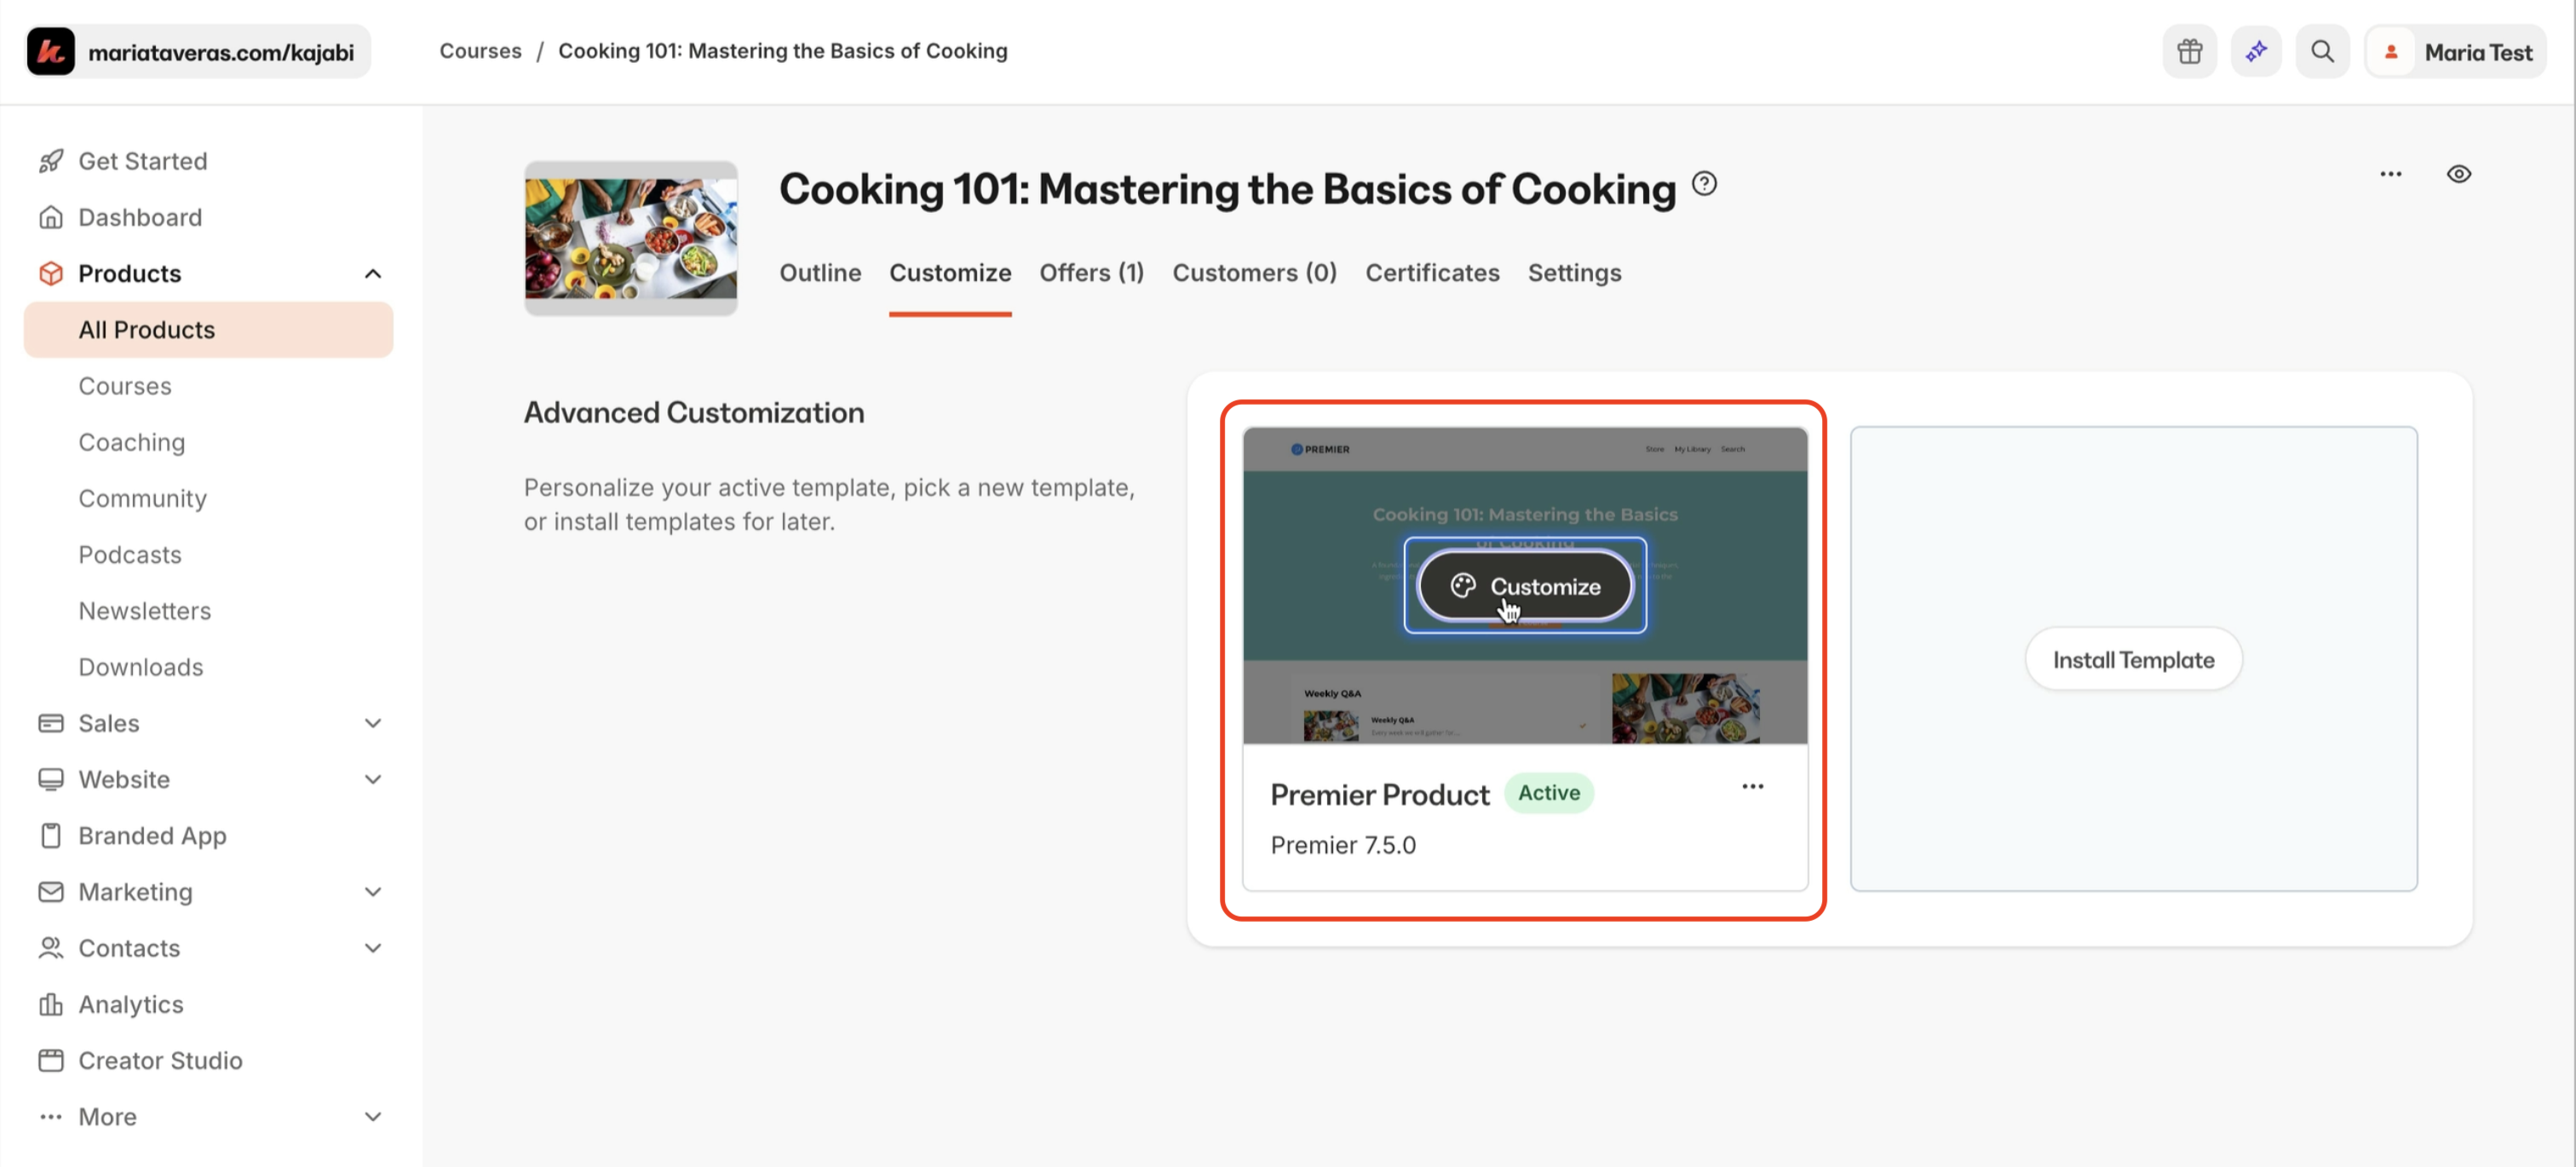
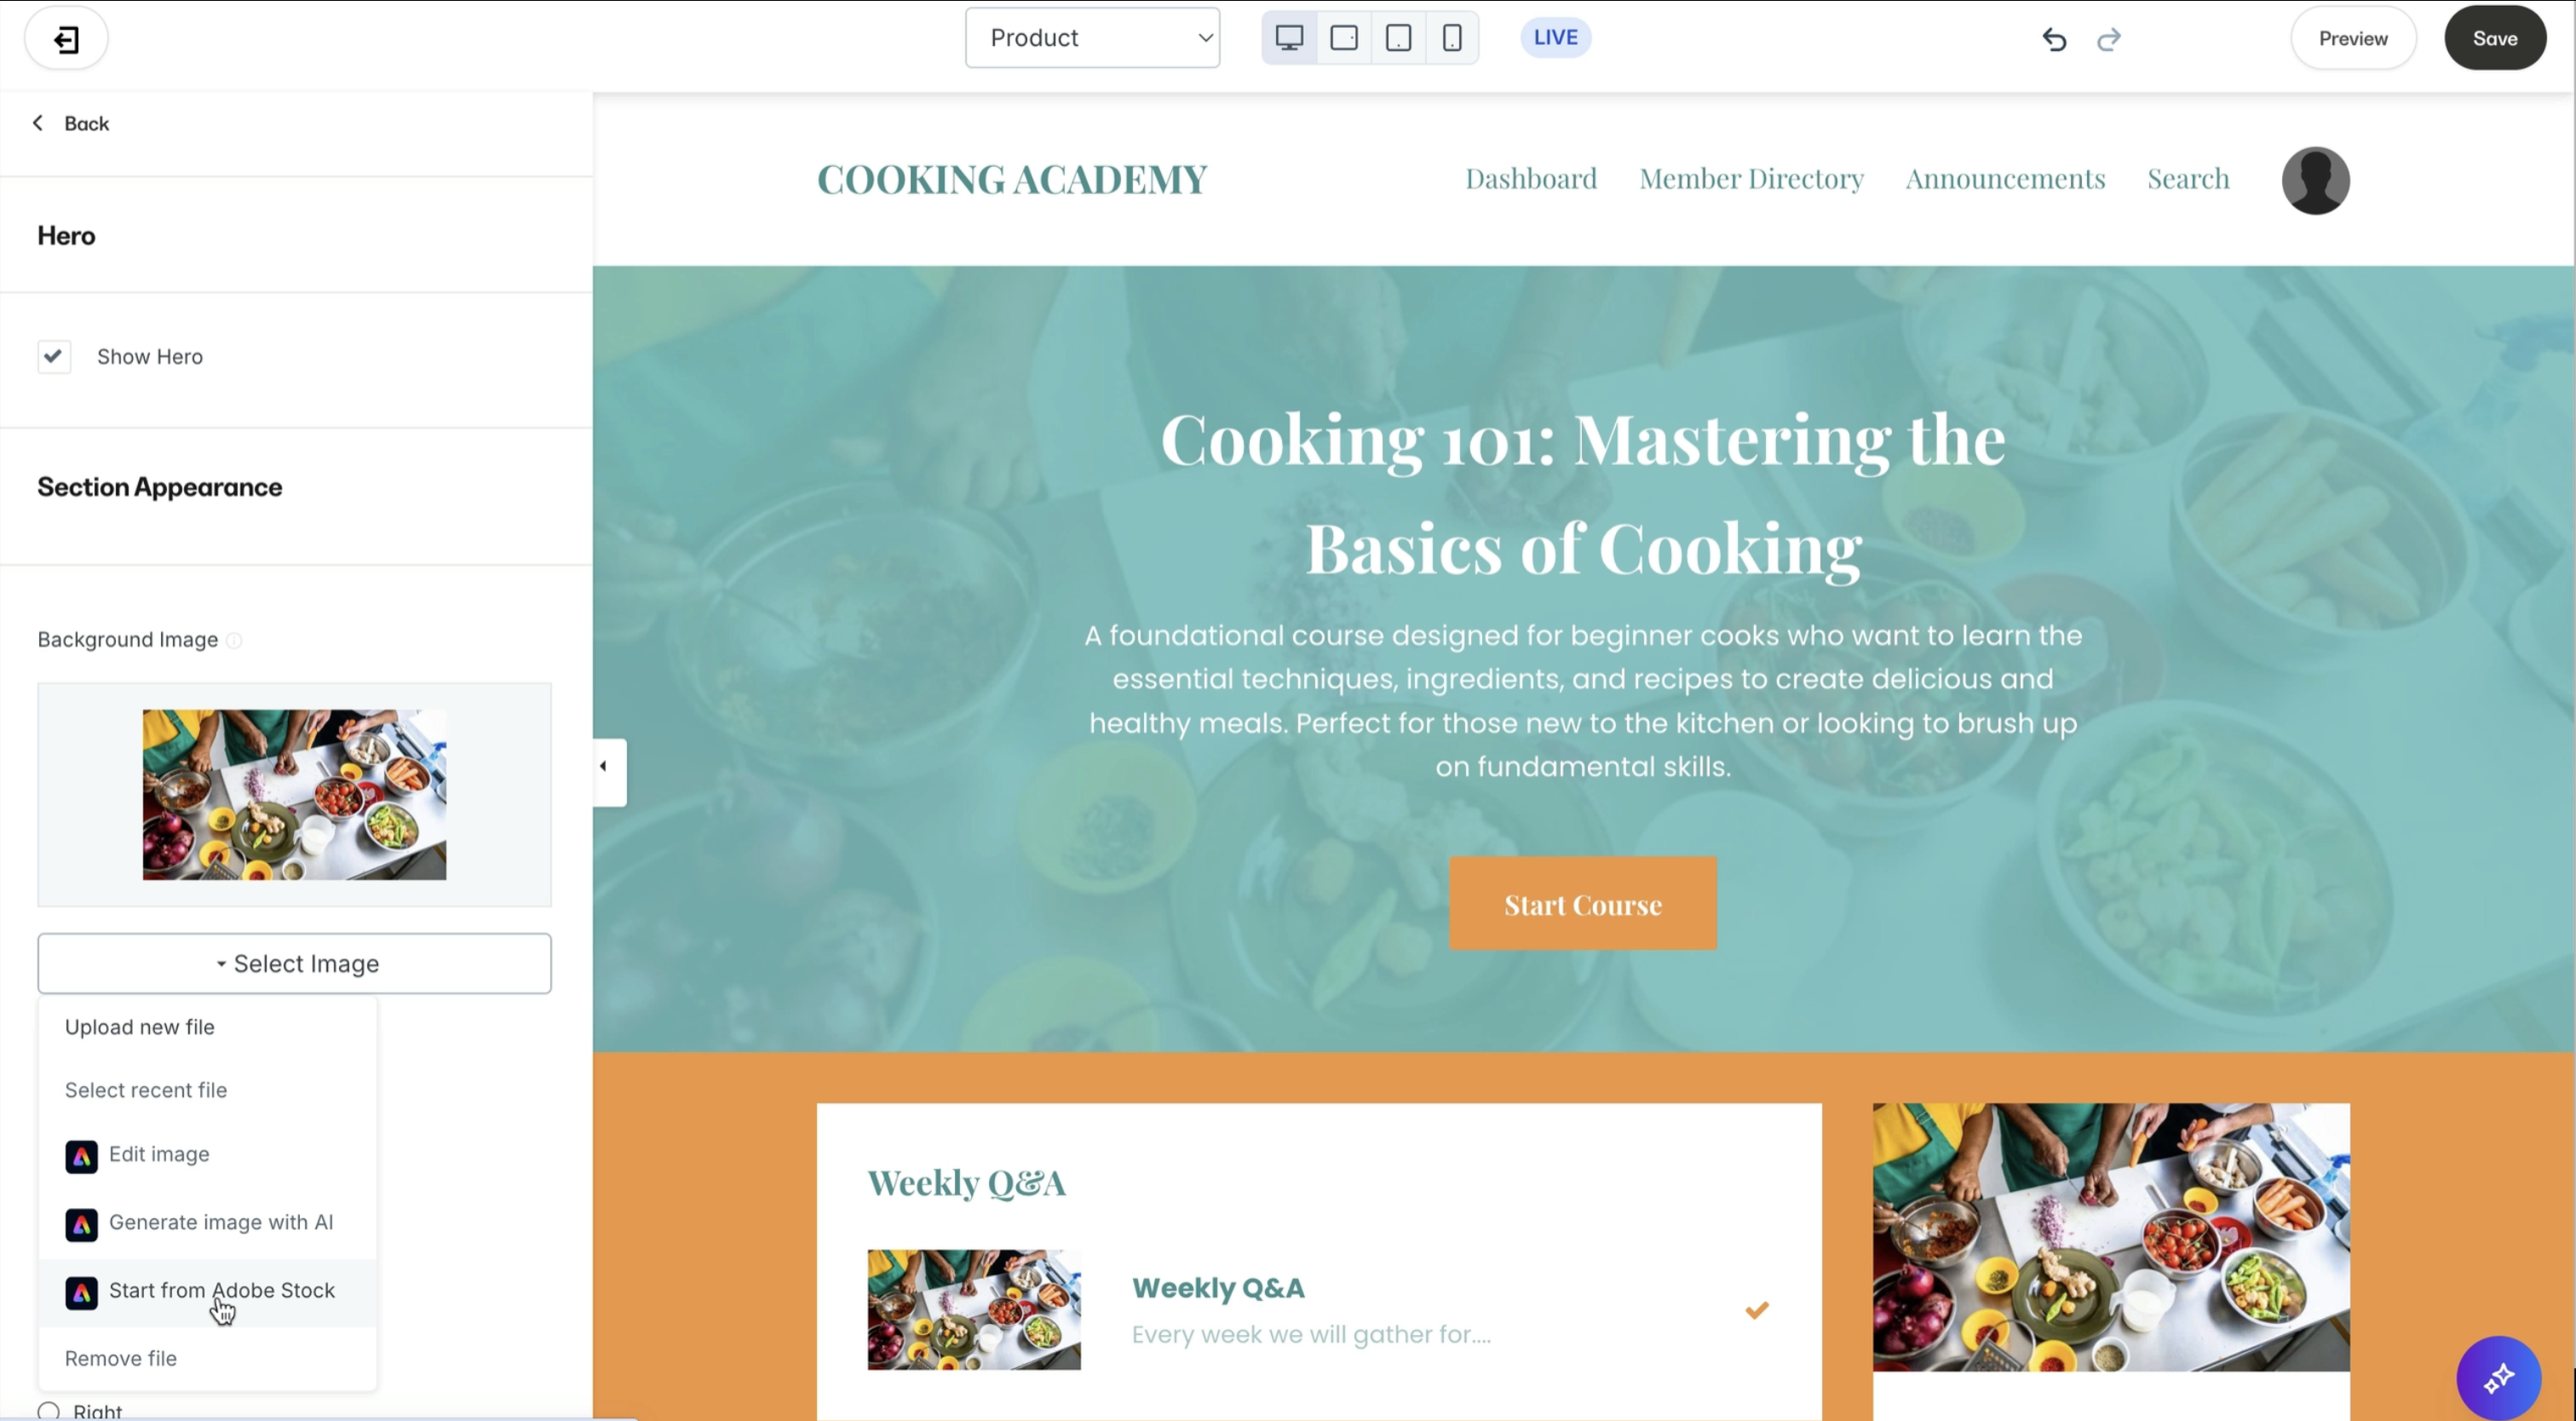
5. Customize the Course Design (brand colors, layout, thumbnails)
6. Set Course Pricing (one-time payment, subscriptions, or “pay what you want”)
✅ Pro Tip: Use drip content to release lessons gradually and boost engagement!
Step 3: Set Up Your Sales Funnel (Sales Page, Checkout, and Thank You Page)
Now that your course is created, let's build the sales funnel to sell it!
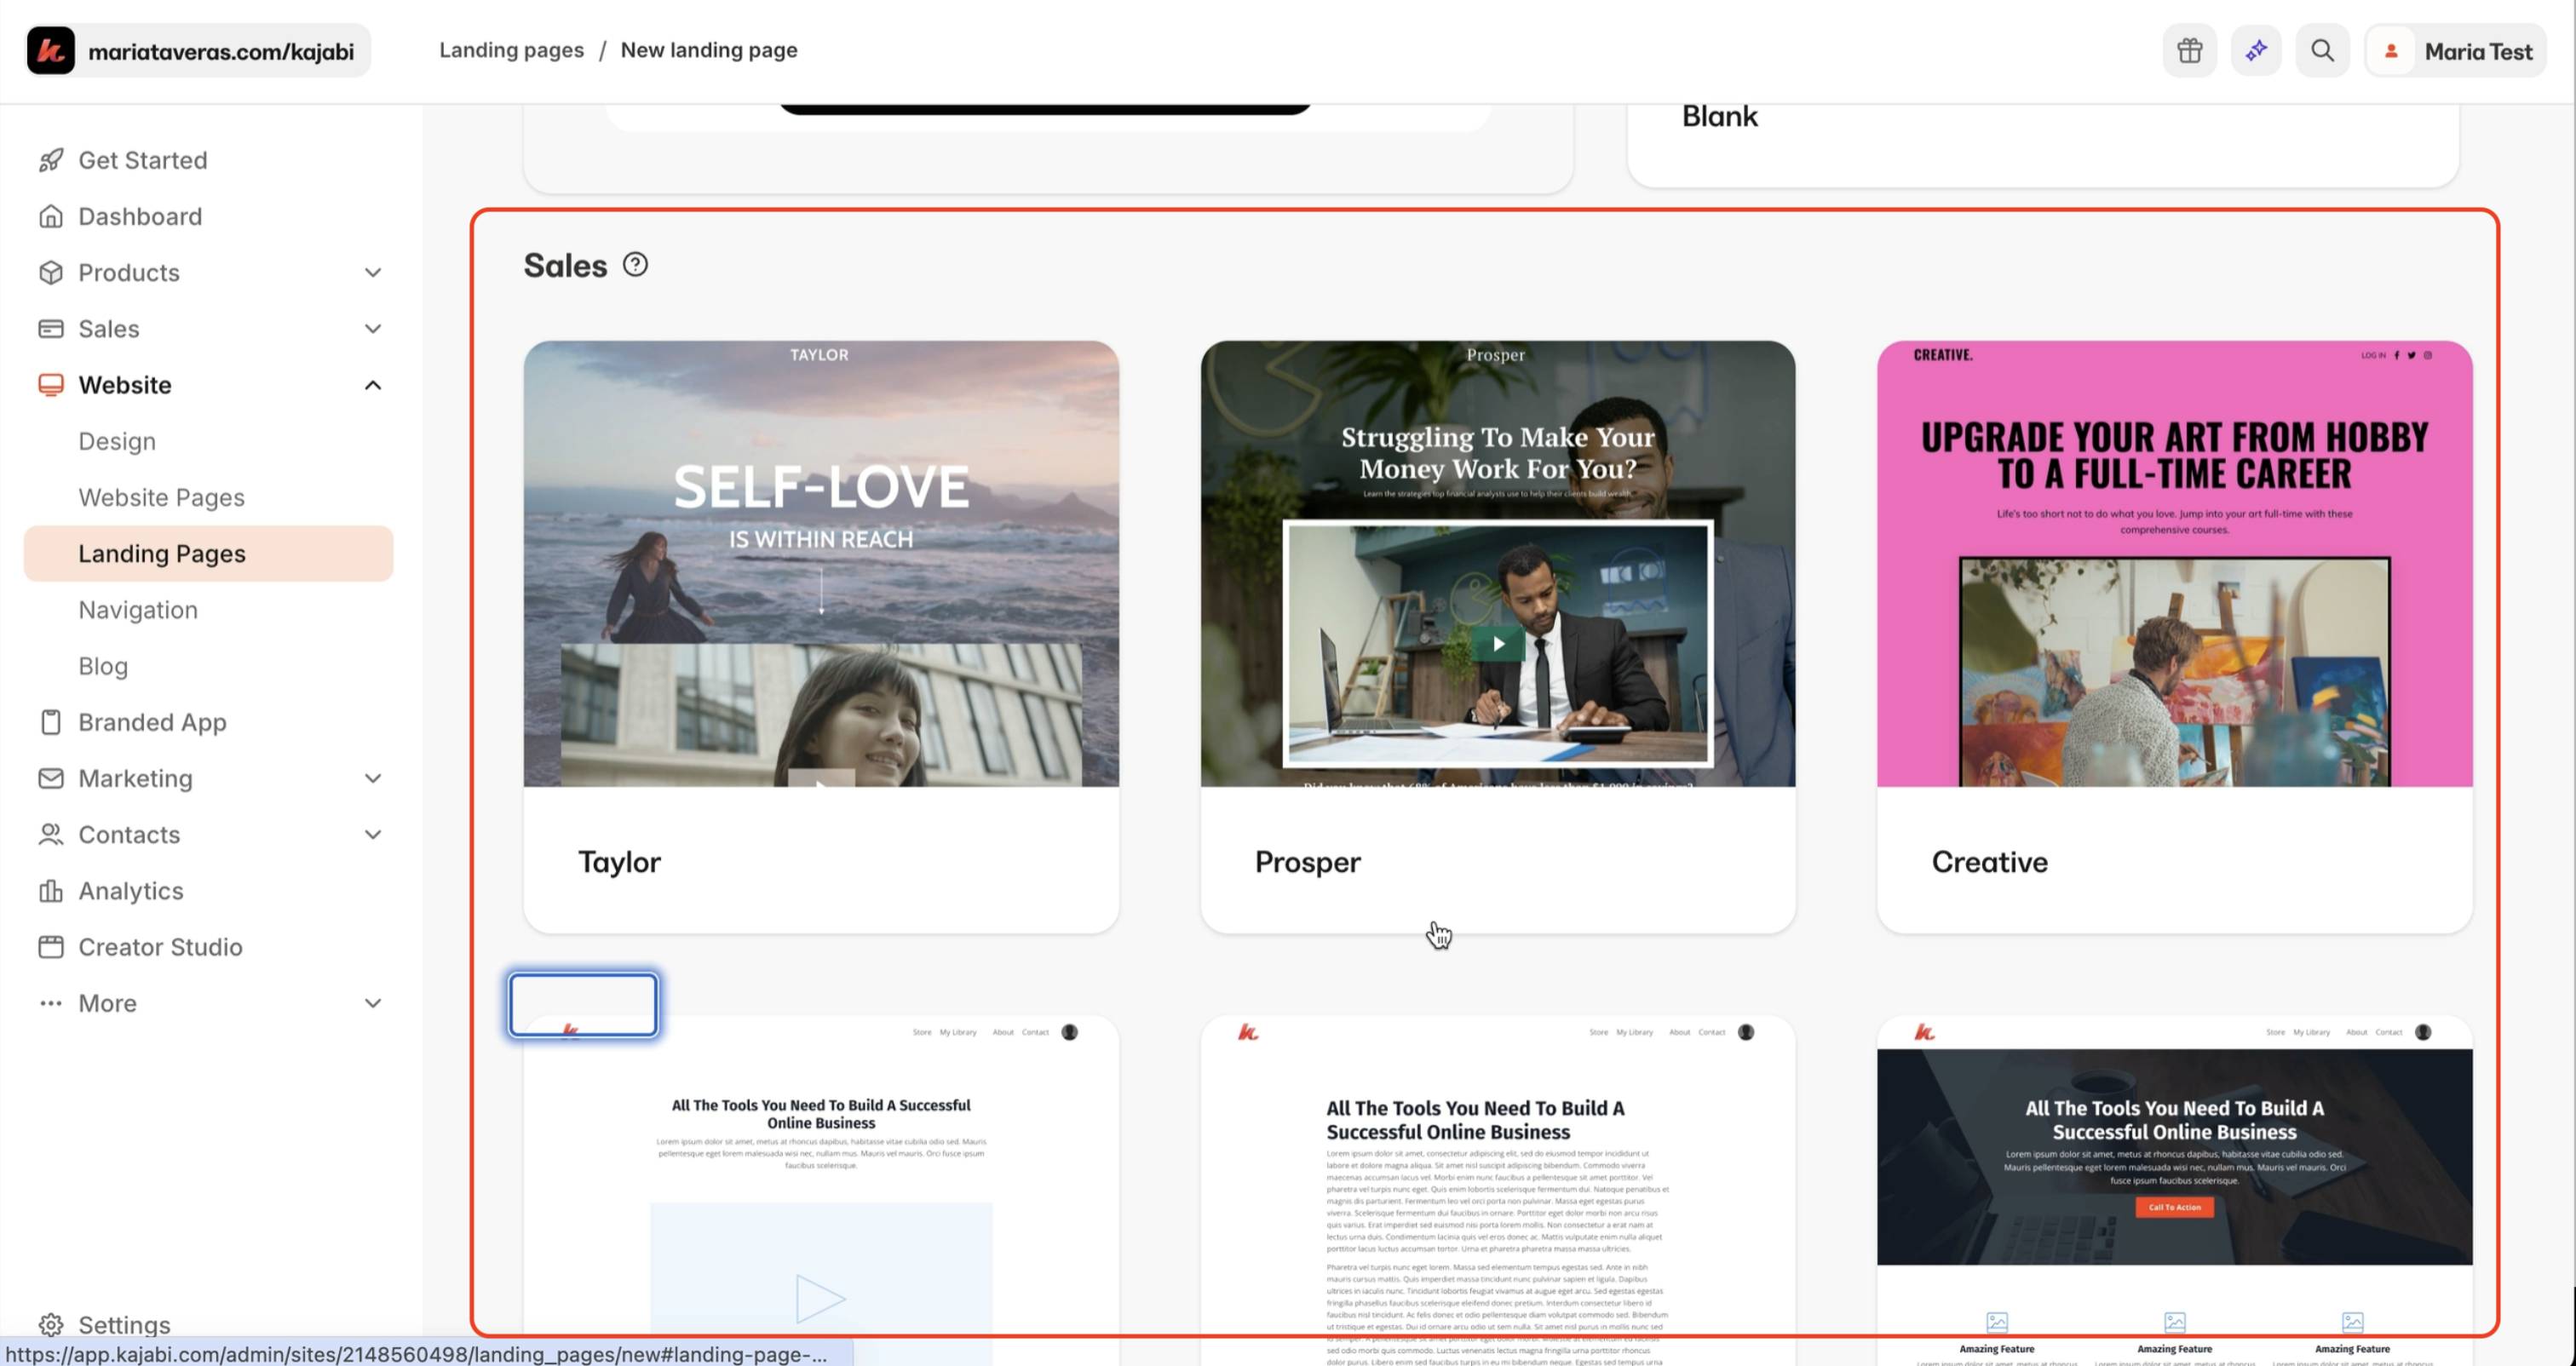
7. Build Your Sales Page
Go to Website → Landing Pages → New Landing Page → Sales Page.
What to include:
- A compelling headline (e.g., “Master Cooking Basics in 4 Weeks!”)
- Course benefits and transformation (what students will learn)
- Testimonials & social proof
- Pricing options & money-back guarantee
- Call-to-action button (linked to check out)
Pro Tip: Use pop-up checkout for a frictionless purchase experience!
8. Create the Checkout Page (Offer Page)
Go to Sales → Offers → New Offer and set up:

- Course Pricing (One-time, subscription, or installment plan)
- Upsells (e.g., add a 1:1 coaching session at checkout)

- Order Bump (e.g., a recipe book as an add-on)

- Checkout Page Design (brand colors, testimonials, video, etc.)
Pro Tip: Enable cart abandonment emails to recover lost sales!
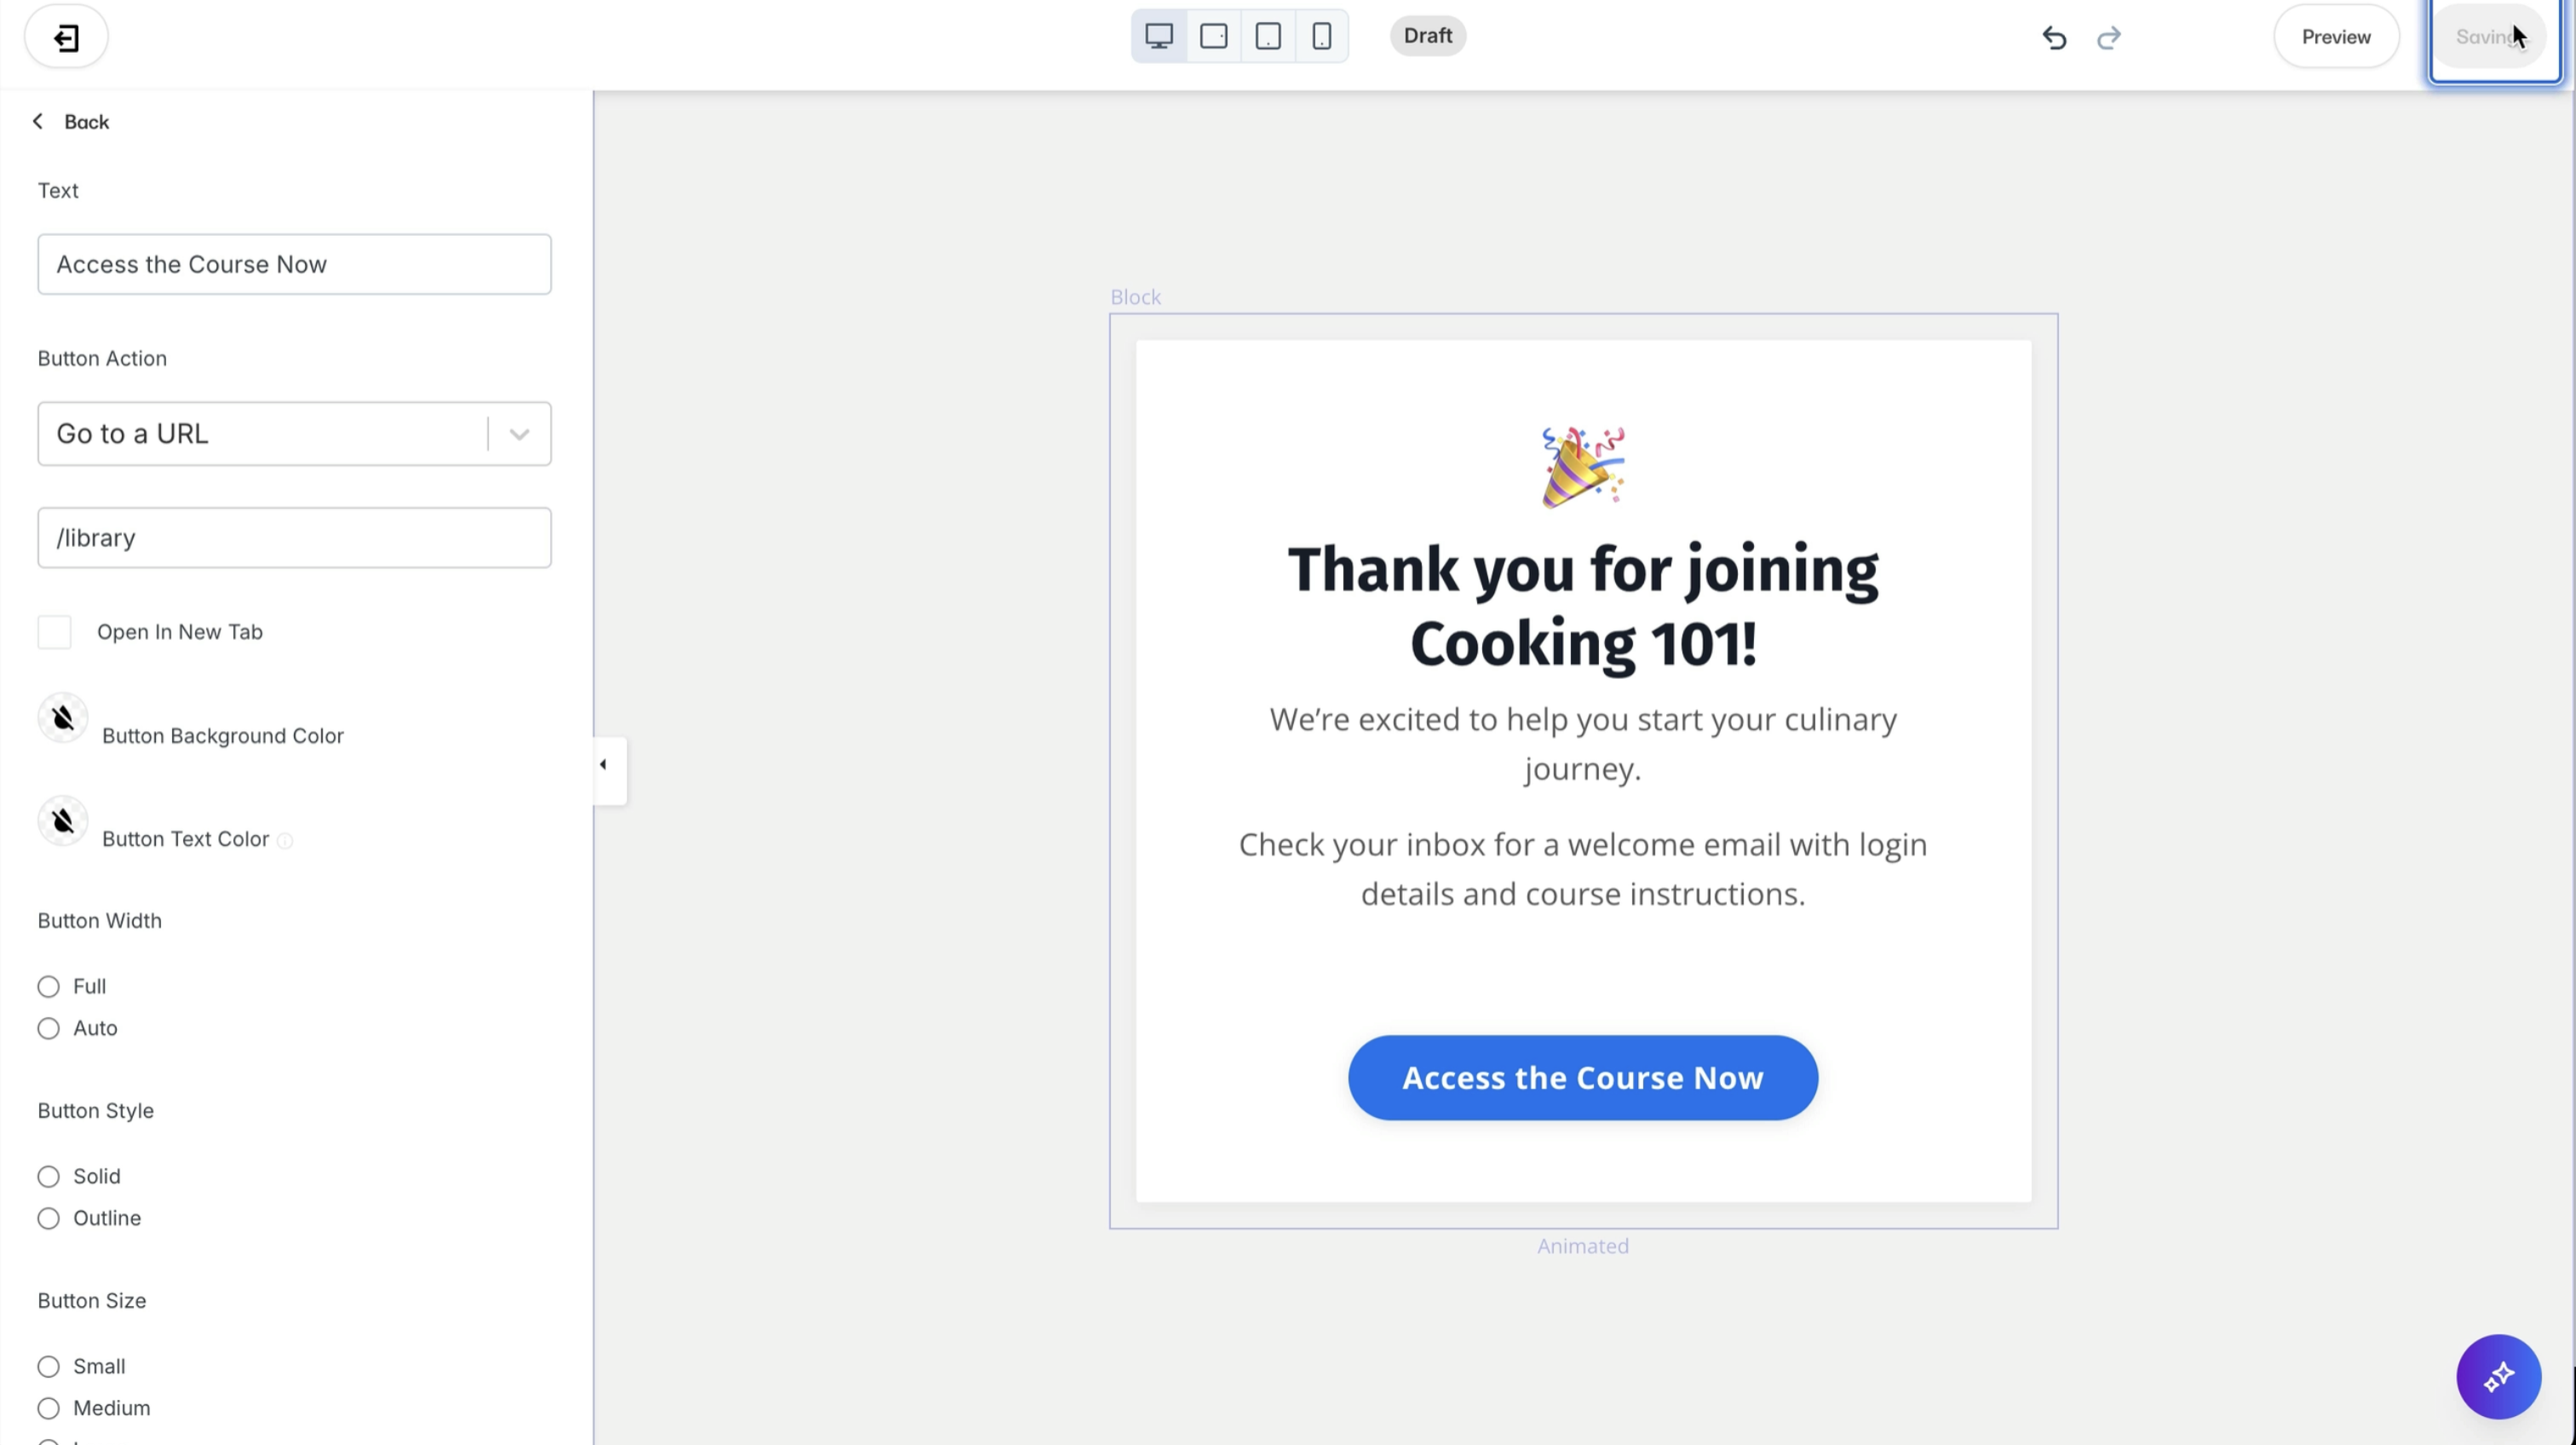
9. Create the Thank You Page
Go to Website → Landing Pages → Thank You Page.
- Add a confirmation message
- Include a button: “Access Your Course Now" (linked to the Library)
- Optionally: Invite them to join a Facebook Group or Webinar
Step 4: Automate Your Welcome Email
First impressions matter! Set up a welcome email that is sent immediately after purchase.
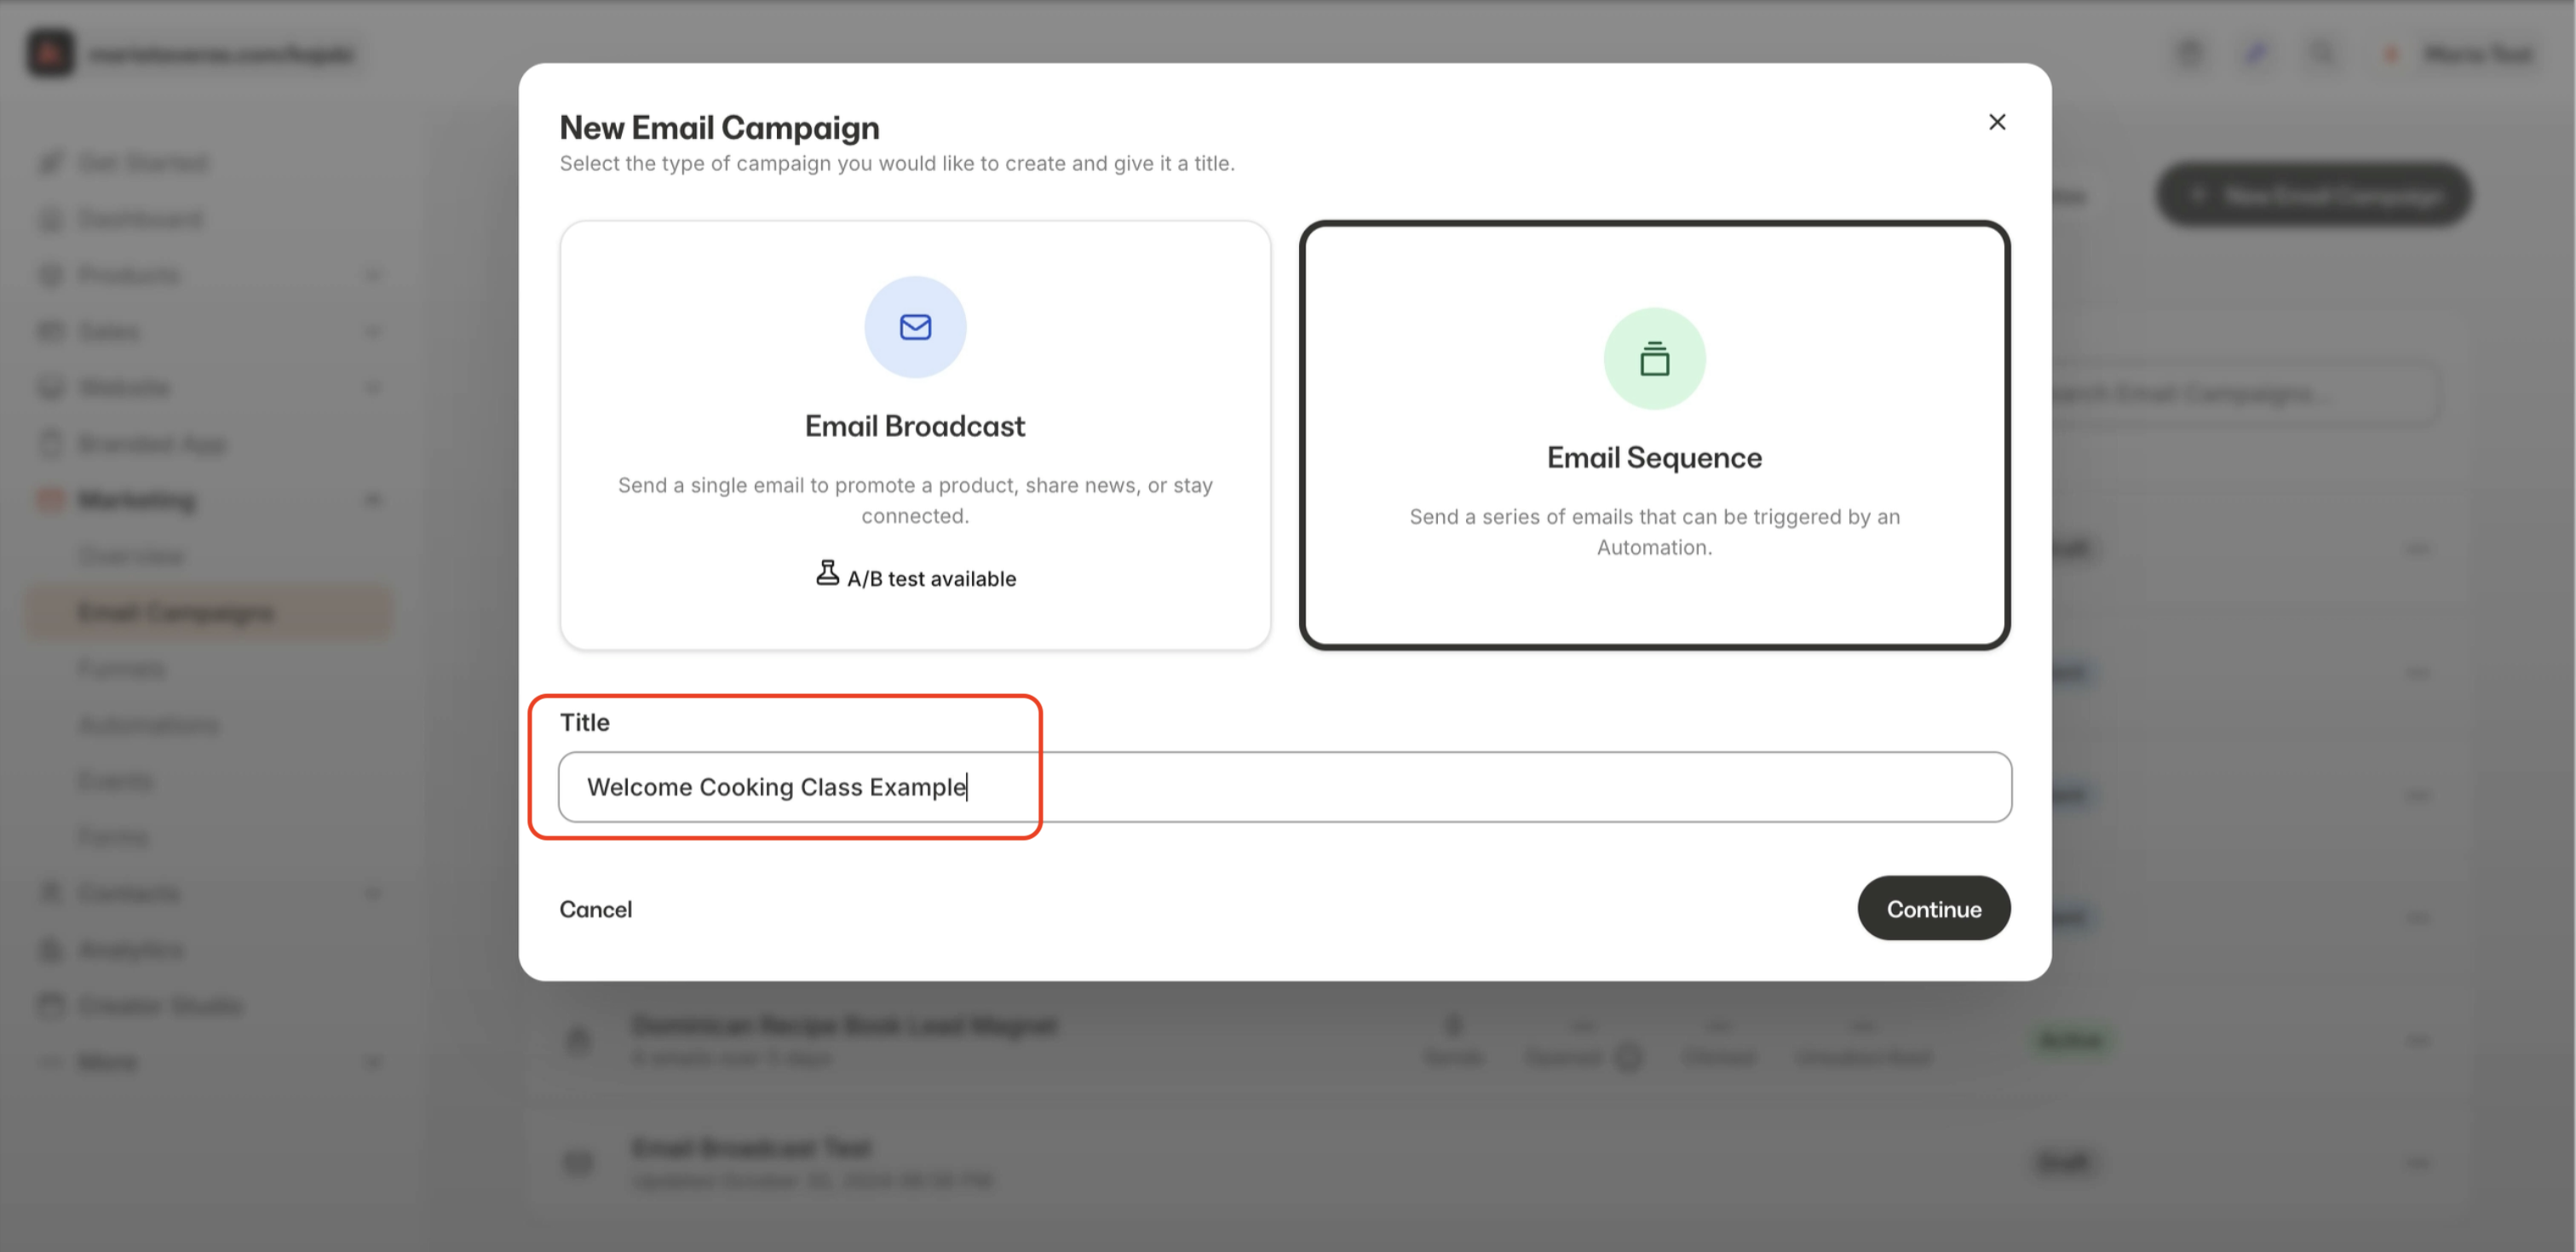
10. Go to Marketing → Email Campaigns → New Email Sequence
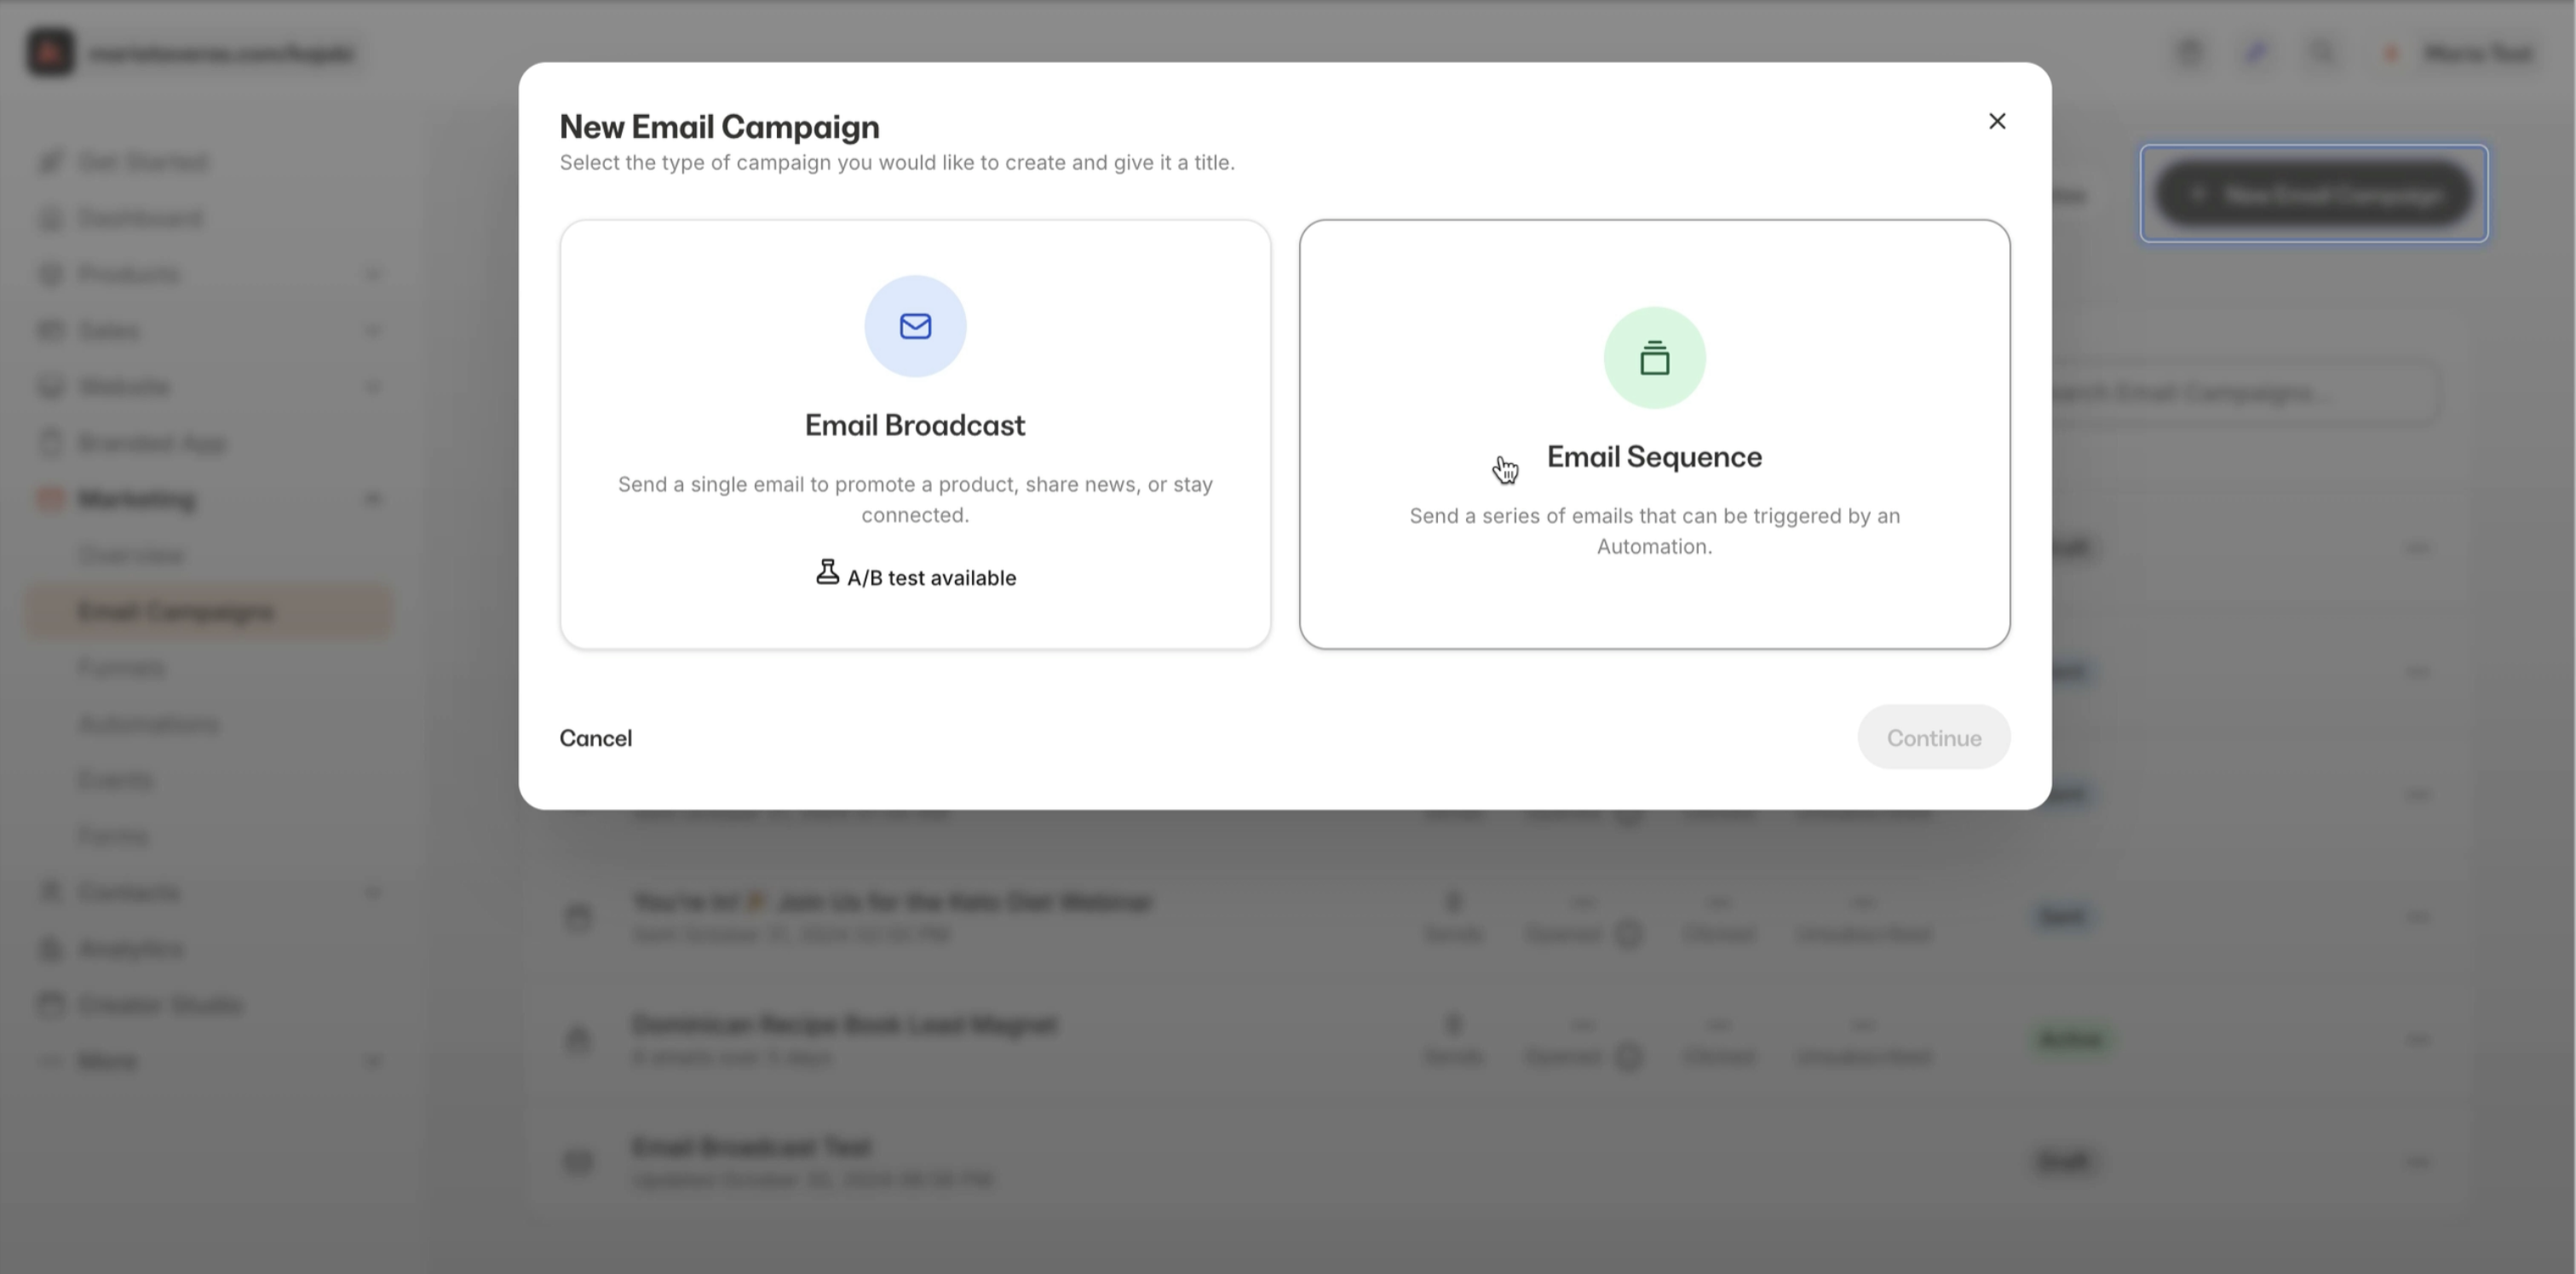
2️⃣ Name it “Welcome Sequence”
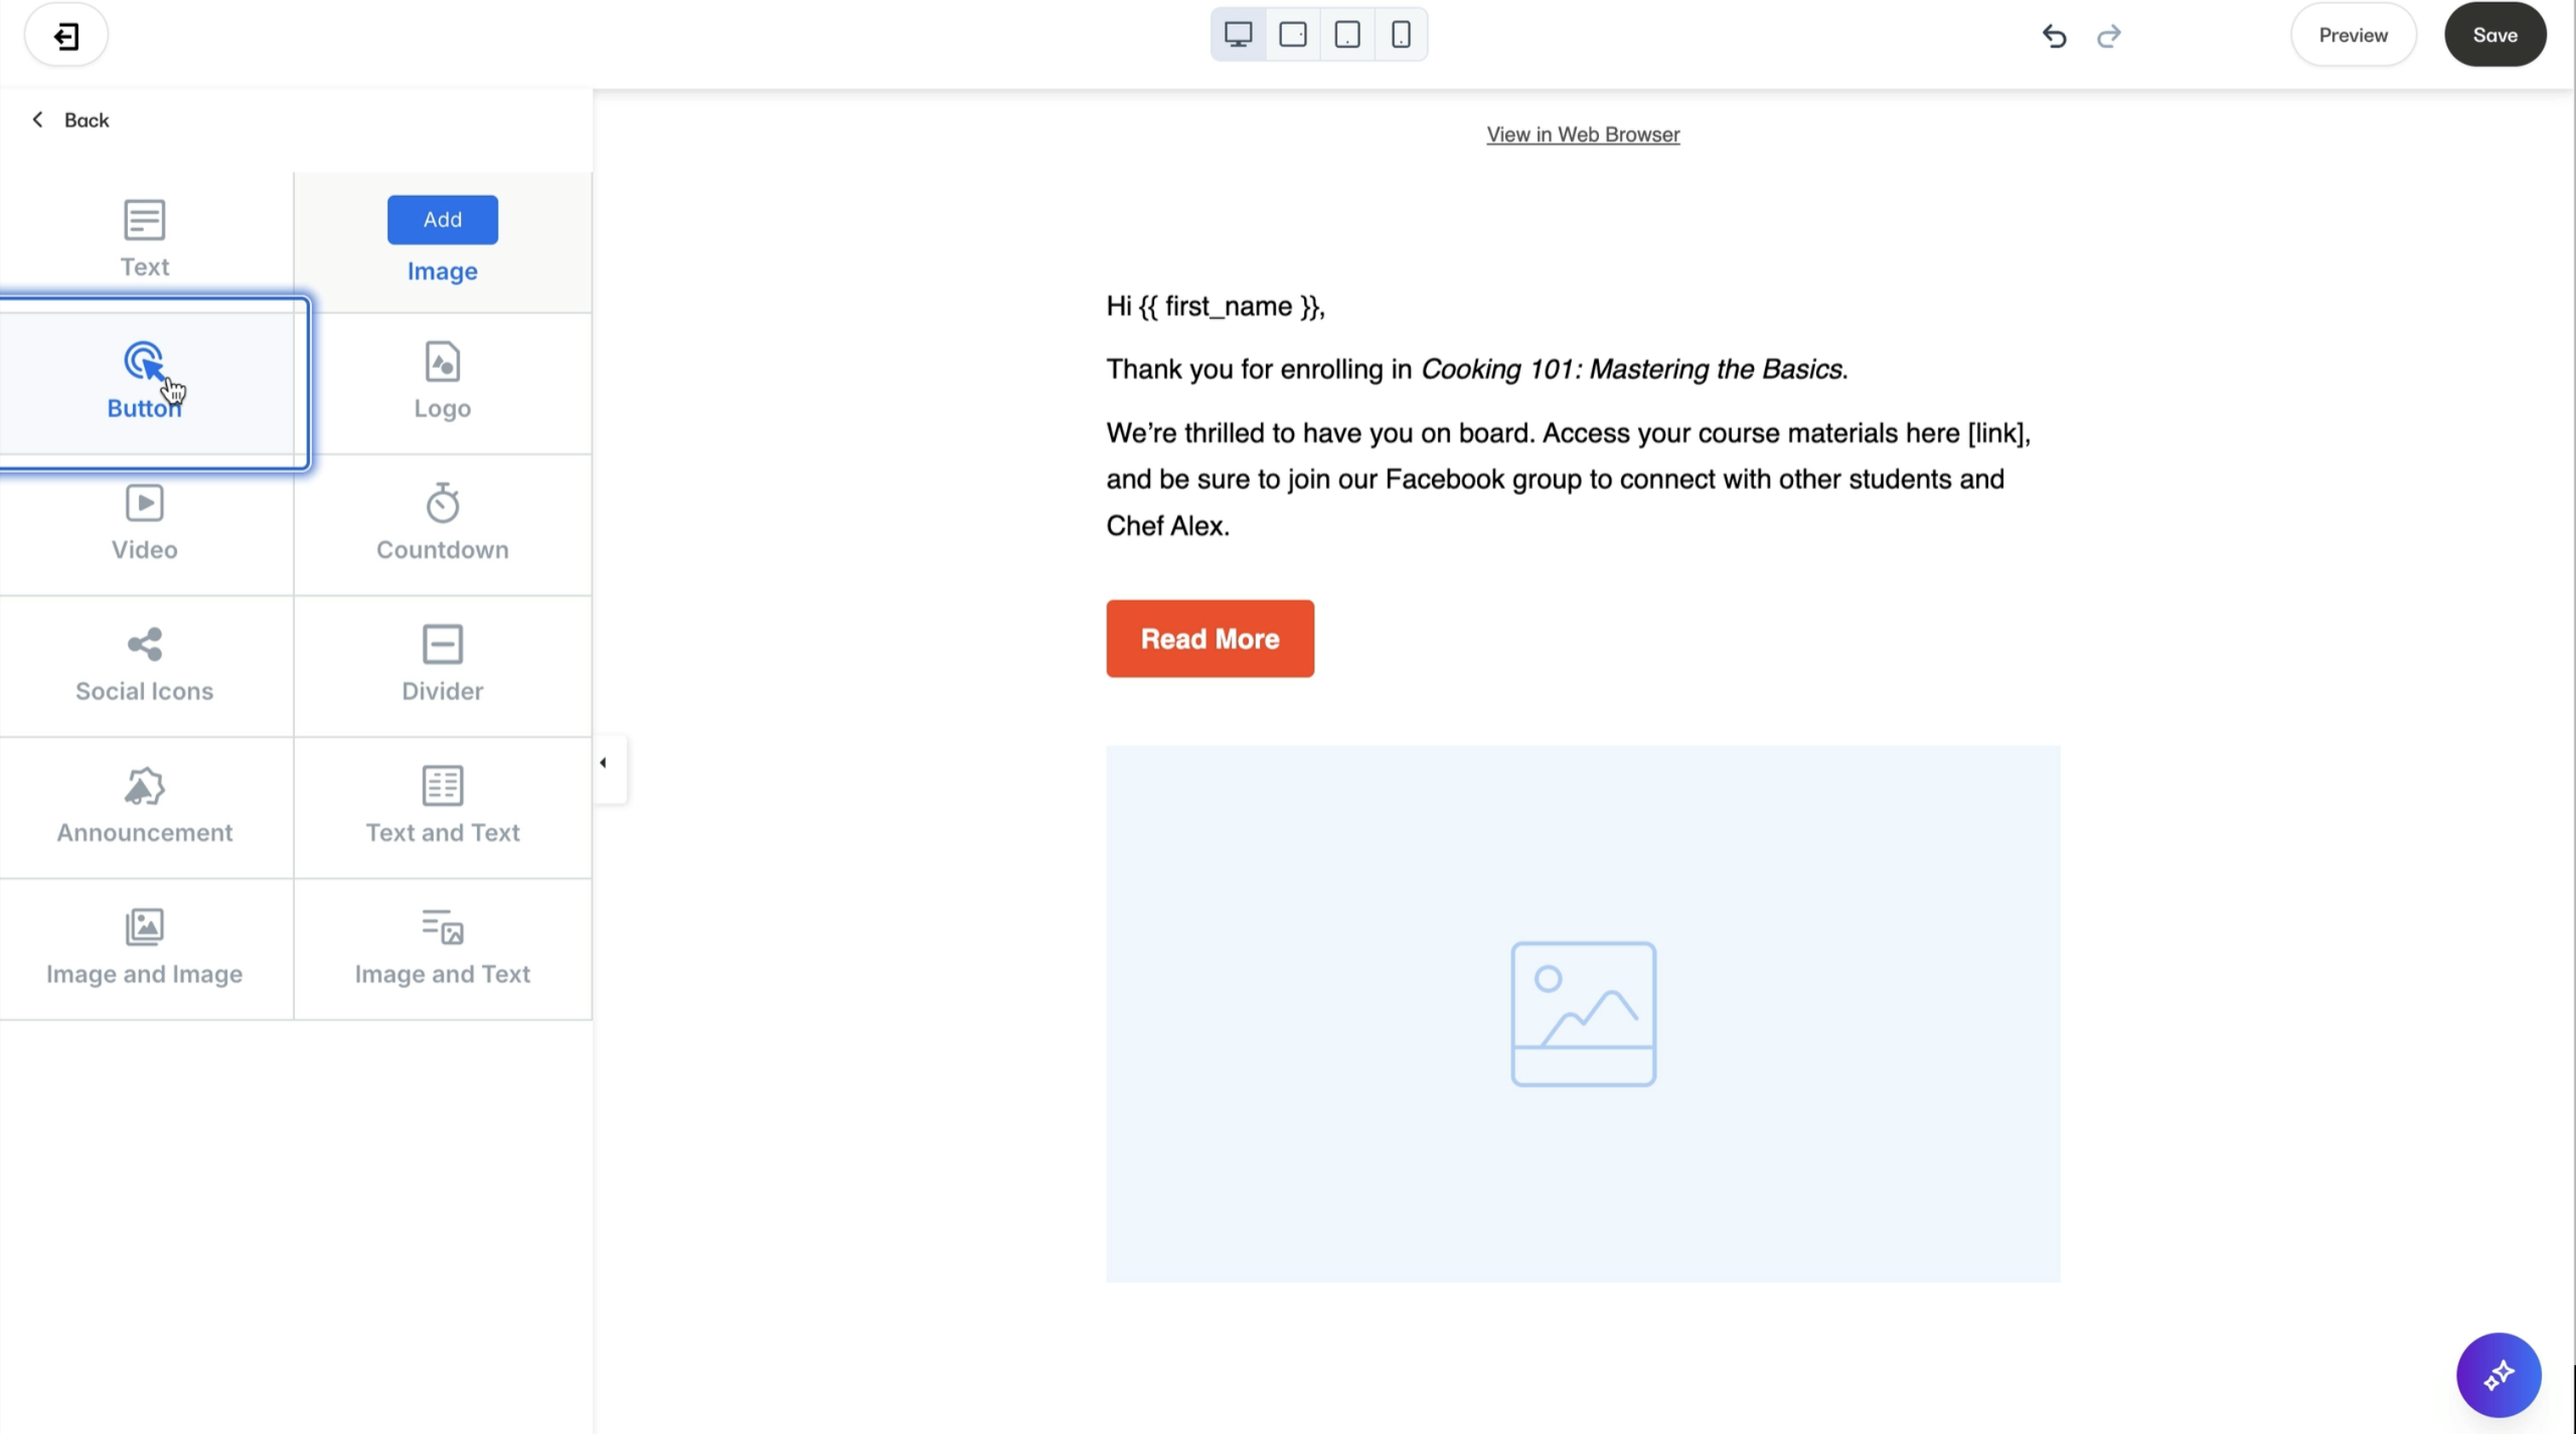
3️⃣ First email (Day 0):
-
Subject: “Welcome to Cooking 101! Here's What to Do Next”
-
Body: Course access link, Facebook group invite, and next steps
4️⃣ Optional: Add follow-up emails (e.g., progress check-ins, bonus content)
Pro Tip: Use automations to segment students and send personalized content!
Final Thoughts: Scale Your Course Business with Kajabi
Congratulations! You now have a fully functional online course with a sales funnel that works on autopilot. Here’s what to do next:
- Test your funnel (make a test purchase to check the user experience)
- Drive traffic (use email marketing, social media, and paid ads)
- Engage with students (offer Q&A sessions, bonuses, and support)
- Optimize and scale (track sales, tweak copy, and improve conversion rates)
Want hands-on support? Sign up for Kajabi using my link and get exclusive bonuses to accelerate your success!
Still have questions? Schedule a call with my team! 🚀
Pick my brain or work live and learn the nitty-gritty behind Kajabi, while I do your tech-setup. Schedule a 1:1 consultation or consultation + implementation call. I'll answer your questions and teach you live while doing the work for you!
Subscribe to my newsletter
When I have something very awesome to share with you that can add value to your online business, your digital marketing strategies or increase your passive income and revenue, I'll stop by your inbox.
I hate spam. Won't do it.


